CSP
Photography
Standards
Introduction
Full comprehension is encouraged by the CSP Director before proceeding.
It’s very easy for an instrument to get misplaced, mistagged, a missing price tag photo would make the item photographed unidentifiable, or an undisclosed or undocumented defect can even lead a customer to return their item which is very costly for us both in dollars and time.
Using a “measure twice, cut once” approach, we will minimize time-costly errors, maximize our through-put velocity and volume, and ultimately support the mission of our organization to the best of our ability. These guidelines may seem strict and specific, but it is only because correcting errors takes twice as much time as getting it right.
The Consumer Sales Program has established a reputation for well-presented products that are photographed and documented well, a history of outstanding and timely customer service, and lightning-fast, secure shipping. The goal is to continue to strive for greatness, never cut corners, and always push for better. Onwards and upwards!
-Heather Willyard O’Connor, CSP Director
Introduction to
Product Photography
Photography Room
Photo Stations
Lighting
Reflective Subjects
Photographing Accessories
Order of Photos
Cameras/Devices
Photographing
Instruments
Flutes, Clarinets, Oboes, Piccolos
Saxophones
Guitars, Bases, Banjos, Mandolins, Ukuleles
Violins & Violas
Cellos & Upright Basses
Trumpets & Cornets
Trombones
Low Brass
Introduction to Product Photography
PHOTOGRAPHY ROOM:
This room should remain closed, when possible, to minimize the amount of dust and debris that gets into the room. The photo fabric backdrops are black, and debris is very apparent in photos. Please remember to turn off the lights and reset the photography room to the way you found it when you leave.
PHOTO STATIONS:
There are two photo stations within the room: the table photo station and the main floor photo station. The table photo station should be used for smaller items and instruments, while the floor photo station is to be used for larger items and instruments. Rule of thumb: if you can see the edges of the table photo station backdrop in the shot, use the floor photo station. You can also use the table for close-up detail of larger items. *PLEASE USE CAUTION* The floor-to-ceiling photo fabric is secured to the ceiling with zip ties. Take care not to step on or pull on the fabric with excessive force.
LIGHTING:
The farther the light source is from the backdrop, the better. The backdrop is a reflective fabric, and its wrinkles will be prominent with angled, close lighting. The table photo station light is frequently rotated for use as an additional light source for the floor photo station.
REFLECTIVE SUBJECTS:
It’s important to note that photographing highly reflective items is like taking a selfie in the mirror, but only it’s a funhouse mirror. The larger and flatter the surface, the more likely you’ll need to worry about the angles you’re shooting from. The brass instruments bells and the glossy backs of guitars are the guiltiest suspects. Please do your best not to appear in the reflections.
ACCESSORIES:
If an instrument comes with additional items, include a photograph of those items. Aside from an instrument stand used to photograph the instrument, do not include any items in the photo that are not included.
ORDER OF PHOTOS:
The order in which you take photos will be the order in which they are displayed on a listing. For this reason, it is very important that you take photos in the right order. The first photo will always be the “profile pic” of the item, and the last will be of the item’s price tag. If there are any flaws or important details not disclosed on the tag, please handwrite them on the tag before photographing it. If there is a stuck valve or slide mentioned on the tag and you happen to get it unstuck, write it down. Same for any other major details you may find. If you see something, say something.
CAMERAS/DEVICES:
Until further notice, photos are to be shot using a CSP approved Apple device. These photos will automatically be synced to iCloud for uploading. Do not be alarmed if the photos you have shot eventually disappear from the device. These devices are not currently approved for any other use. Please store photo devices in the photography room, plugged in and charging. The Wi-fi signal is weak in the back of the building, so please “take the devices for a walk” at the end of your shift to encourage a sync.
Photographing Instruments
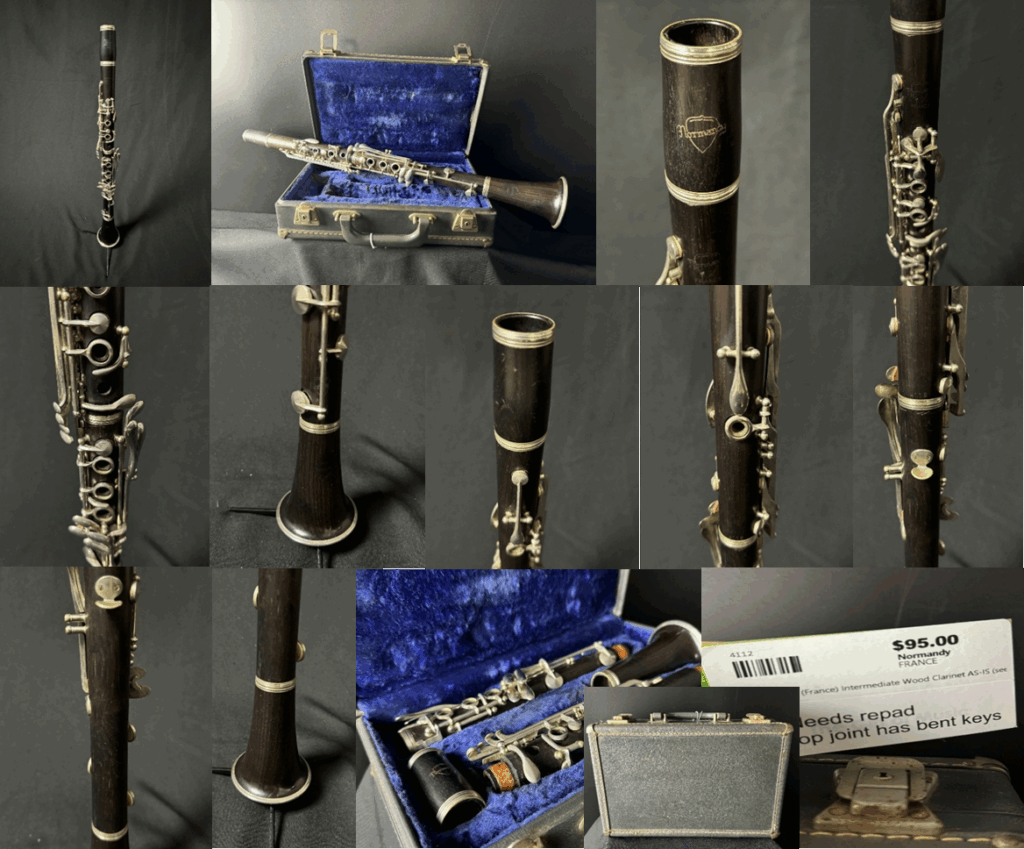
FLUTES, CLARINETS, OBOES, PICCOLOS:
*If for some reason the instrument cannot not be assembled, simply photograph in its case. This is acceptable for extremely low value or “sold for parts” instruments. With clarinets and oboes, you may have to use cork grease to assemble the instruments. Put a red dot sticker in the bottom right of the price tag to signal that it has been photographed. Store the instrument on the correct listed shelf.
- “Profile Pic” – main picture should capture the entire instrument or item.
- Instrument assembled atop case
- Instrument assembled on instrument stand.
- Take pictures from the top down, capturing all major features and parts – if multiple features/parts can be captured in a single photo.
- Close-up of brand emblem/engraving
- Close up of cork tenons on clarinets and oboes
- Flip the instrument, photo the back – from the top down.
- Close Ups of Any Damage
- Instrument in Open Case
- Case Exterior
- Price Tag (not only does this tag provide the info necessary for listing the item, but it also serves as a visual tool to separate items as they sync to photo storage.)
VIOLINS & VIOLAS:
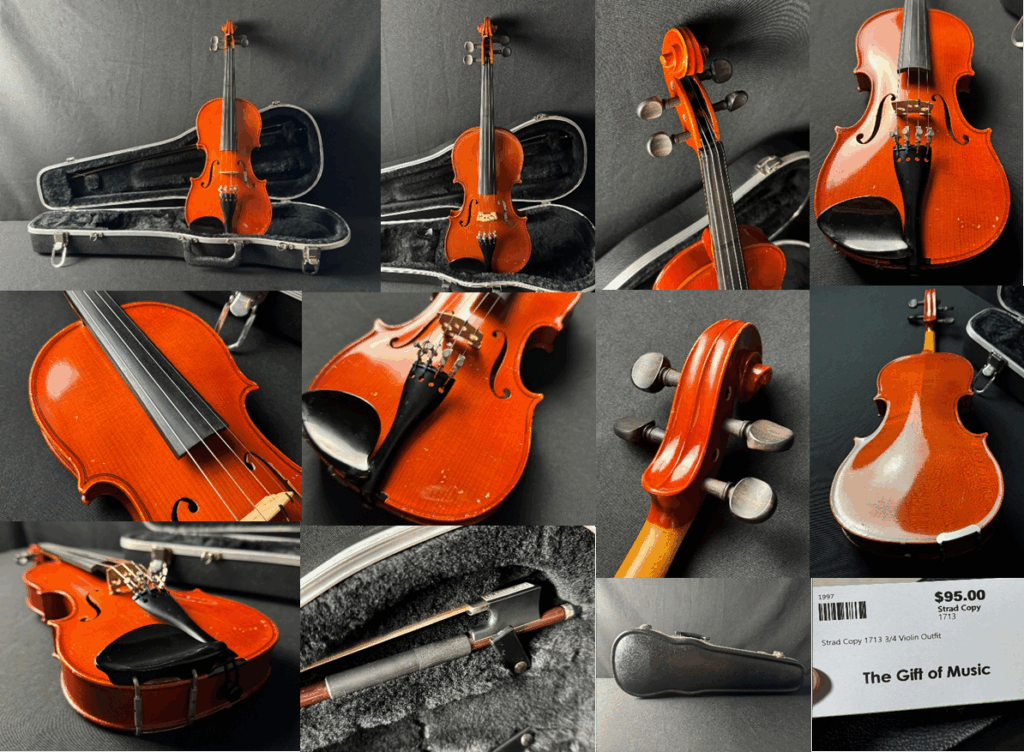
*Photograph at Table Photo Station with case open against the wall, prop up the instrument to stand up in the case. Adjust and center bridges if necessary. Check the seams of instrument for separation, or any cracks on the top or back not mentioned on the tag. Notate and photo. Ensure that the instrument size is correctly listed (check the size on the label inside the F-hole) Put a red dot sticker in the bottom right of the price tag to signal that it has been photographed. Store the instrument on the correct listed shelf.
- “Profile Pic” – main picture should capture the entire instrument or item.
- Take pictures from the top down, capturing all major features and parts – bonus if multiple features/parts can be captured in a single photo.
- Close up photos of front, and from all angles
- Flip the instrument, photo the back – from the top down
- Photograph any blemishes
- Photograph bow, any included accessories
- Instrument in Open Case
- Case Exterior
- Price Tag (not only does this tag provide the info necessary for listing the item, but it also serves as a visual tool to separate items as they sync to photo storage.)
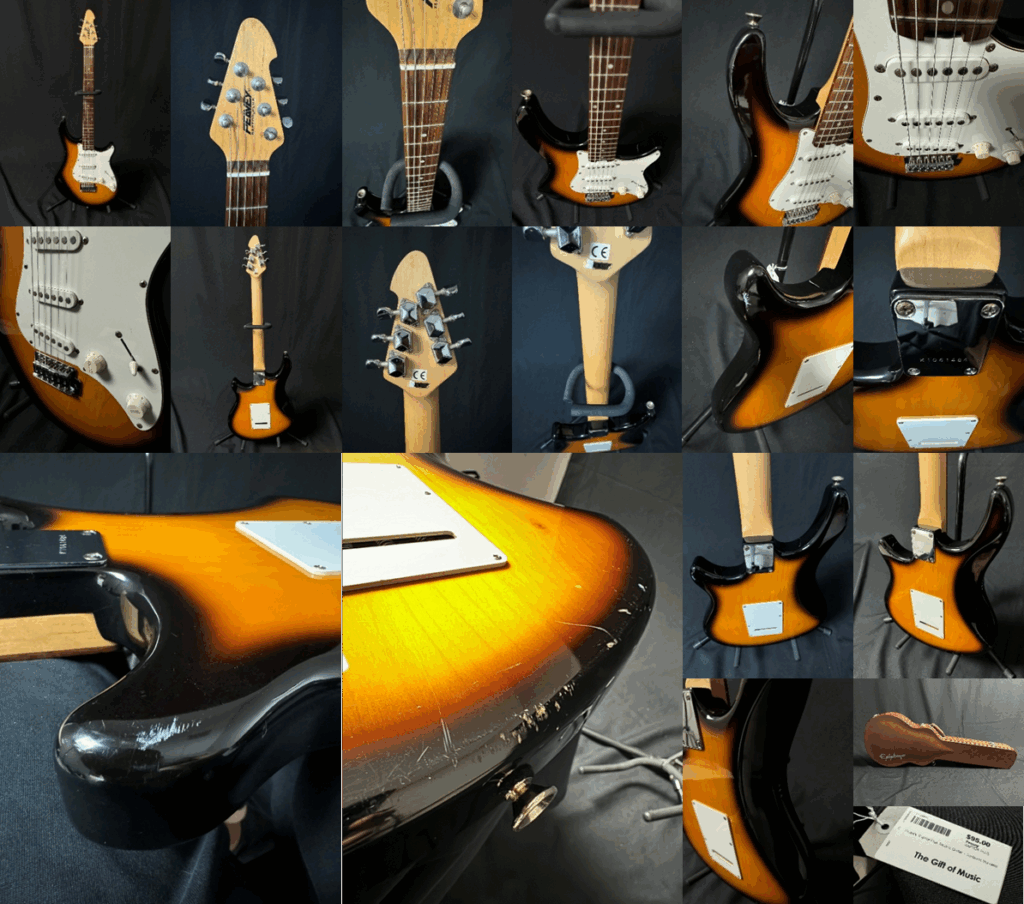
GUITARS, BASSES, BANJOS, MANDOLINS, UKULELES:
*Use wooden stand for acoustic, black stand for electrics, banjos, and basses, small stand for ukuleles or mandolins. Put a red dot sticker in the bottom right of the price tag to signal that it has been photographed. Display guitars and basses on the wall on the sales floor. Store displayed instruments’ cases in the back room.
- “Profile Pic”
- Headstock front, headstock angles if classical
- Angled down – capture nut/fretboard
- Fretboard/Guitar shoulders
- Entire top at an angle that shows possible wear and tear
- Angled up – bridge
- Side view at end of fretboard – show action height
- Soundhole sticker (Acoustic Guitars only)
- Strap buttons, if present
- Close Ups of Damage, if present
- Case
- Price Tag (not only does this tag provide the info necessary for listing the item, but it also serves as a visual tool to separate items as they sync to photo storage.)
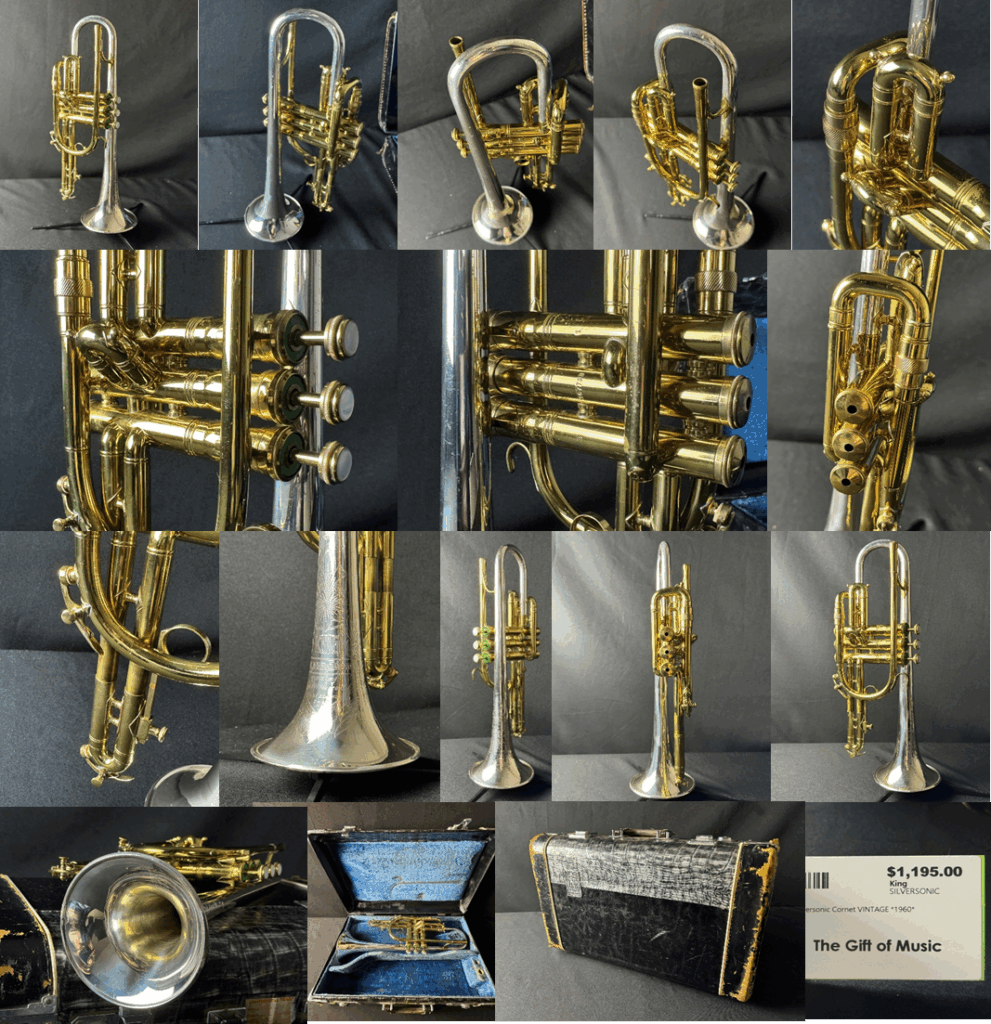
TRUMPETS & CORNETS:
*Photograph at Table Photo Station on a trumpet stand, then laid on side atop the case. Put a red dot sticker in the bottom right of the price tag to signal that it has been photographed. Store the instrument on the correct listed shelf.
- “Profile Pic” – main picture should capture the entire instrument.
- Wide shot from all angles
- Take pictures from the top down, capturing all major features and parts – bonus if multiple features/parts can be captured in a single photo.
- Photograph all the valves and slides
- Photograph water keys
- Leadpipe
- If a broken solder point is mentioned on the tag, photograph it.
- Close-up of brand emblem/engraving
- Close-ups of Damage
- View of Bell Interior – Instrument on top of open case
- Case Exterior
- Price Tag (not only does this tag provide the info necessary for listing the item, but it also serves as a visual tool to separate items as they sync to photo storage.)
